Get started with GitM
A five-minute walkthrough for a designer whose machine already has GitM installed. If GitM is not installed yet, see Installation first.
By the end you will have signed in, checked out a part, edited it, and checked it back in.
Prerequisites
- GitM is installed and SolidWorks shows the GitM PDM task pane. (If it doesn't, see Verify the installation.)
- You have a GitHub account that has been granted access to your team's repository.
- Your team's GitMCloud is configured and your account is on its allowlist.
This requires GitMCloud — see GitMCloud docs. Without GitMCloud reachable and your account allowlisted, the first-run wizard will not let you connect.
1. Open the task pane
In SolidWorks, look for the GitM PDM tab on the right-hand task pane strip. Click it.
On first launch with no settings, the first-run wizard opens automatically.
2. Sign in and connect to your team repository
- In the wizard, choose Connect to an existing team repository.
- Paste your team's GitHub repository URL (your CAD admin provides this).
- Choose a local folder on your PC where the files will live.
- Authenticate with GitHub when prompted.
- The wizard checks GitMCloud access, clones the repository, and reports a file count when done.
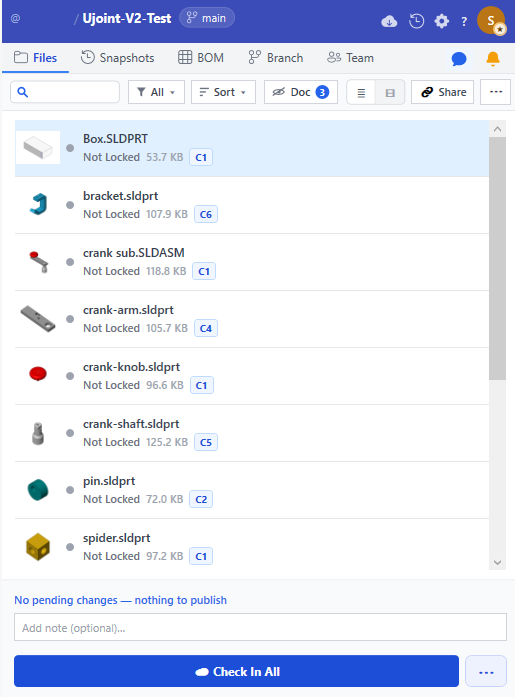
Expected result: the Files tab fills with your team's SolidWorks files. Most will
show a ·placeholder· badge — see step 4.
If you see "GitMCloud: … Contact your administrator" the access check failed. Your account isn't allowlisted, or GitMCloud is unreachable. Stop and contact your admin — see Connect to GitMCloud.
3. Check out a part
Files in the repository are read-only until you check them out. This prevents two people editing the same binary CAD file at once.
- In the Files tab, find the part you want to edit.
- Right-click it and choose Check Out & Open (checks out and opens in SolidWorks), or Check Out if you only want to acquire the lock.
Expected result: the row shows Locked by Me (amber), and the file is now writable. Other team members see it as locked by you.
4. (If needed) Make the file available on this PC
If the part shows ·placeholder·, only a lightweight stub is on your PC, not the full
file. To edit it you need the real bytes.
- Right-click the part → Make Available on this PC.
- Wait for the download to finish; the
·placeholder·badge clears.
See Make a file available on this PC.
5. Edit and save normally
Edit the part in SolidWorks and save as you always do. GitM marks the row as modified (an M badge).
6. Check in your changes
- Right-click the file → Check In.
- Type a short description of what you changed.
- Click Check In.
Expected result: GitM commits, pushes to GitHub, and releases your lock in one step. The file returns to read-only, the lock clears, and your change is published as a new cloud version of that file — visible to teammates.
Check In publishes one file; it does not create a snapshot. When you want to mark a whole-project milestone, use ☁ Publish Snapshot — it captures the entire repository's current state. See Publish a snapshot.
Tip — local checkpoint without publishing: use Save Local Version to save a local-only checkpoint while you keep the lock and keep working. It is not visible to teammates until you check in. See Save a local version.
What next
- Get the latest files — pull in teammates' changes.
- Open an earlier version — recover a past snapshot.
- Work with branches.
- Concepts — understand placeholders, versions, and the lock model.
Troubleshooting
| Symptom | Likely cause | What to do |
|---|---|---|
| No GitM PDM task pane | Add-in not loaded | Verify the installation |
| Wizard blocks with a GitMCloud message | Account not allowlisted / GitMCloud down | Connect to GitMCloud |
| Can't save a file in SolidWorks | File is read-only (not checked out) | Check it out first (step 3) |
File is dim with ·placeholder· |
Bytes not on this PC | Make Available on this PC (step 4) |
| "Check In" fails to push | Remote moved ahead, or a conflict | Troubleshoot everyday issues |